
Disclaimer: ActBlue user roles and permissions dictate what users can do on our platform. If the tools or features mentioned in this article are unavailable to you, please speak to your Dashboard Admin(s) about updating your permissions.
In this article:
- Can I sell tickets to my campaign or organization's event through ActBlue?
- How do I create an event form?
- How do I add event details and ticket levels to my form?
- What if I want to provide specific event information to my guests only?
- How can I re-arrange, edit, or delete ticket levels?
- Where can I view guest information for my form?
- How can I share and promote my event form?
- What if I want guests to be able to purchase tickets at the door to my event?
Can I sell tickets to my campaign or organization's event through ActBlue?
Yes! Using ActBlue's event forms tool, you can easily sell and track tickets for an event and keep all of your fundraising in one place. Your donors can buy tickets using all the same payment methods they can use on regular contribution forms, including their debit/credit card, the saved card in their ActBlue Express account, PayPal™, Google Pay™, Apple Pay®, and Venmo™.
How do I create an event form?
To create a new event form, simply log onto your Dashboard and click the Create Form button in the top left corner:

Next, select Event Form from the form type options provided:

Once you've selected event form, you'll need to provide a title, link name, and customer service email address for your new form. Don't worry if you haven't settled on a final title yet - you can always change it later! We ask that you provide a customer service email address so our support team can contact you if a donor has questions about your event. You can also fill in your donation ask on this page.
Additionally, you will be required to indicate whether your event is in-person or virtual.
After you finish filling out the basic information for your event form, click Publish Now to complete the form creation process. While your form will become live as soon as you publish it, we strongly recommend ensuring that all ticket levels and event details are fully added to your form before actively sharing it with your supporters.
How do I add event details and ticket levels to my form?
To add event details and make other edits to your form, simply open up your form and click the blue Edit button in the top left corner. This will open up the Form Editor and the following menu:

From here, you can add or edit your event form's title, link, and donation ask by clicking on the Title, Ask, and URL tab:

Generally, you should treat the donation ask as an overview of your event. If your event includes speakers or a program agenda, we recommend adding that information in the donation ask field so that attendees have all the details they need before they purchase a ticket. Make sure to save any changes you make by clicking the green Publish button as you work!
Next, add your ticket levels by clicking the Tickets tab:

To create a new ticket level, click the green Add Ticket Type button:

Fill out your new ticket's name, description, price, and number in the spaces provided.
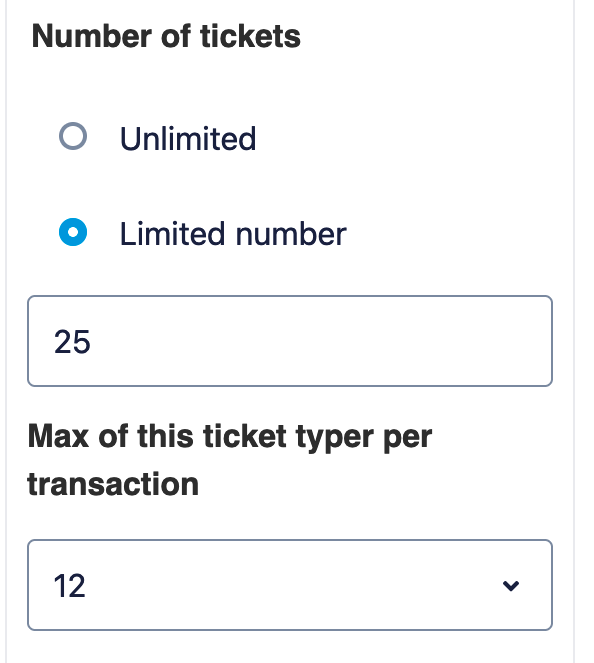
If you want to limit the amount of tickets that can be purchased for a specific ticket level, select Limited Number from the dropdown and then enter the specific number of tickets that can be sold for this ticket type. Once you reach the limit, that ticket type will sell out and the option will be automatically removed from the form. If you ever need to increase the limit you entered, you can do so by editing the ticket level later.

You can also set a per transaction limit on tickets by selecting a number from the Max of this Ticket Type Per Transaction dropdown. This will prevent a donor from buying more than one single kind of ticket in one transaction:
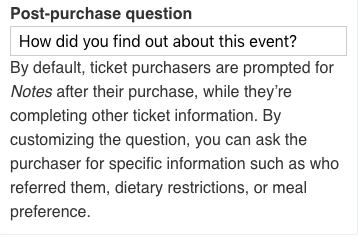
Lastly, if you'd like to ask your guests a question post-purchase (ex. what meal they'd like at a dinner event), include that question in the Post-Purchase Question box:
Once you've finished filling out the information for your ticket level, be sure to click Done and then Publish to save your changes.
If you want to include an option for free tickets, add a ticket type and leave the Price field blank. The ticket price for this ticket option will then appear on your form as “Free!”
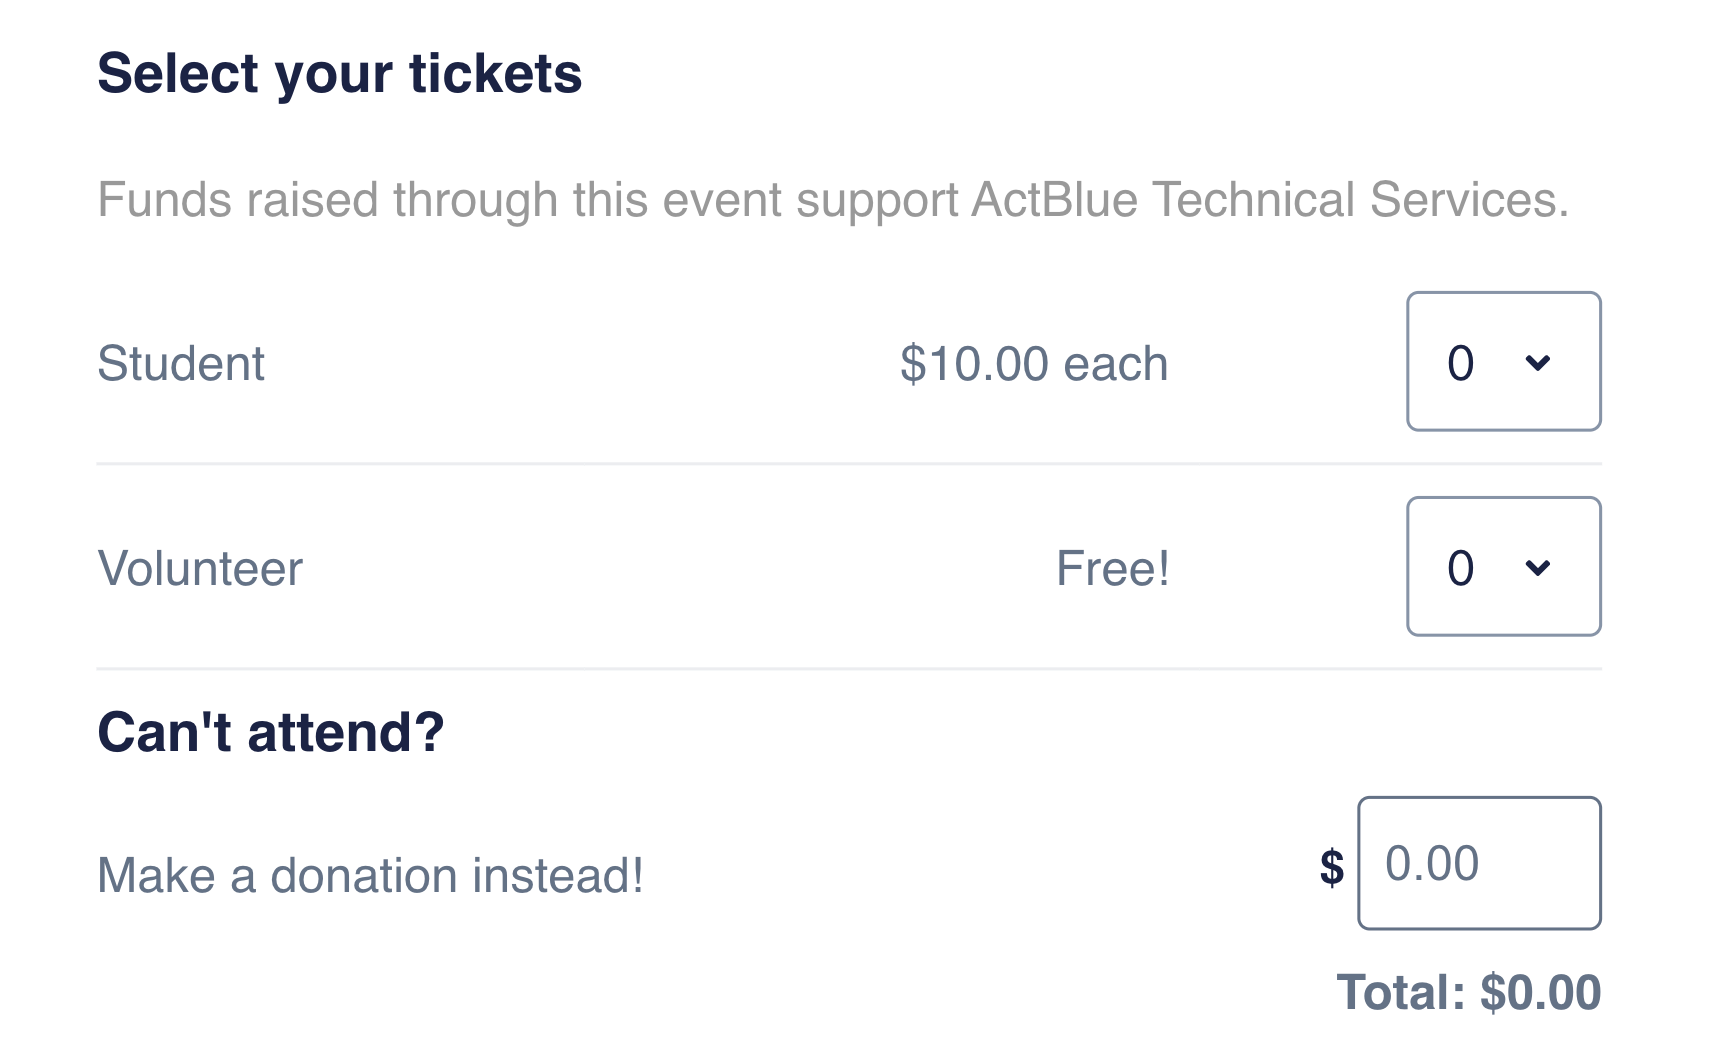
The “Can’t Attend?” donation box will also appear underneath your ticket levels to enable supporters to contribute even if they can’t attend your event. Please note that this donation box is included on every ActBlue event form and cannot be removed. Additionally, after a ticket quantity has been selected, the "Can't Attend?" language will automatically change to "Make an additional donation," allowing donors to make a donation alongside their ticket purchase.
After purchasing a ticket, donors will be asked to provide the name(s) of the guest(s) attending and any notes they may have. Donors will also be given the option to add your event to their Google, Apple, or Outlook calendar by clicking the Add to Calendar button at the top of the receipt page.

Creating ticket levels will also trigger the Event Details tab to appear:

Here, you can include your event's start and end time and the type of event you'll be hosting (virtual or in-person). If you’re hosting a virtual event, you’ll also be required to include the link in the Event Details tab. Please note that the event link will only be available via the receipt your donor receives post-purchase and will not appear publicly on the form.
A Note on Timezones
When setting the start time for your event, please note that the timezone for your form will default to the form creator's local timezone (ex. if the team member who created your form is located in California, the form's timezone will automatically be set to PST).
If a donor from a different location views your event form, they should automatically see your event's set start time displayed in their local timezone (ex. if your event is set to start at 10am PST, a New York donor will see the start time displayed as 1pm EST).
This change does not extend to the confirmation receipt your donor will receive via email, meaning that if a donor purchases a ticket through your event form, the start time listed in their confirmation email will still be in the form's original timezone (ex. if your event is set to start at 10am PST, a New York donor will see the start time on the form displayed as 1pm EST, but will receive a confirmation email indicating the event begins at 10am PST).
What if I want to provide specific event information to guests only?
If you have certain information that you’d prefer to keep private (such as the address for a high-profile event), we recommend including it in the email receipt text for your form vs the Event Details tab. This will ensure that only guests who purchase tickets to your event will have access to your event information.
If you choose to go this route, we strongly suggest including a line in your donation ask text explaining what information will be sent to guests post-purchase. This will help prevent guest confusion leading up to your event.
To edit your email receipt text, open up the Form Editor and select the Thanks and Receipt tab from the options provided:

Next, write your message in the Email Receipt Content box and publish your changes. You can also send a sample receipt to yourself here.

How can I re-arrange, edit, or delete ticket levels?
If you need to make changes to a ticket type after creating it, open up the Form Editor and select Tickets from the options provided:
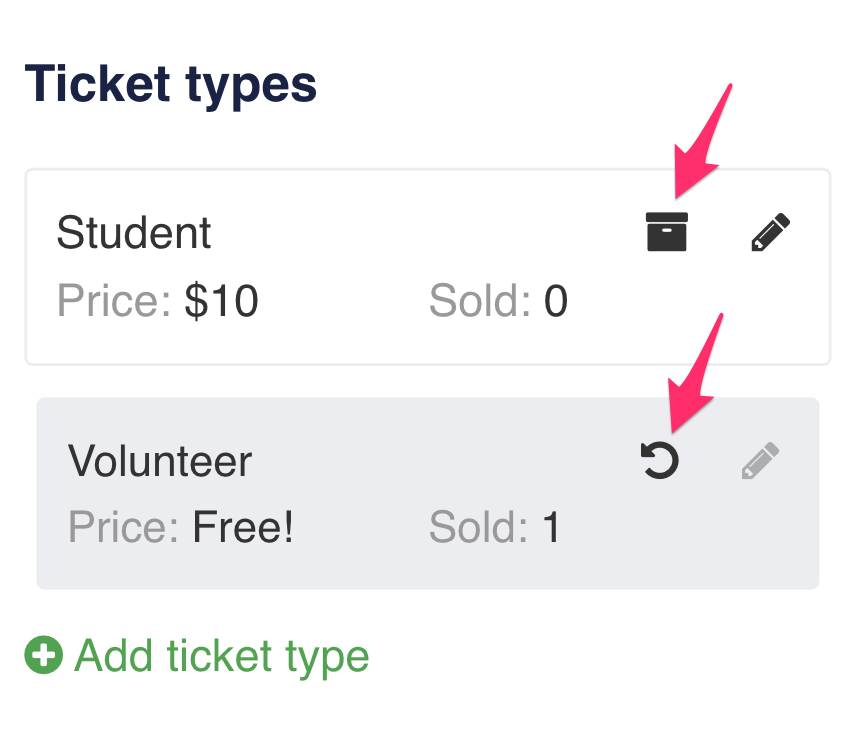
Next, identify the ticket level you'd like to edit and then click on the pencil icon to make your changes:

To remove a ticket level from your form, click the black box/archive icon. You can also restore an archived ticket level by clicking the arrow icon that will appear in the box's place:
To change the order of tickets on your form, simply drag and drop your ticket levels and then click the green Publish button.
Where can I view guest information for my event form?
To view your event form's guest list, simply open up your form and click the Guests tab at the top of the page.
The Guests tab will display a list of all guests attending your events, along with their notes or responses to your Post-Purchase Question. You'll also be given the option to download a copy of the guest list as a PDF or CSV:

How can I share and promote my event form?
If you want to share your event form's link with potential supporters, simply open up your event form and copy and paste the URL displayed in the address bar.
If you’re having hosts sell tickets on your behalf, click the More dropdown at the top of your form and then select Promote from the dropdown:

Here, you can create custom links for your event form that each host can use to sell tickets. To do this, type the host’s name (or other identifying feature) in the Refcode box provided and then copy and paste the new URL:
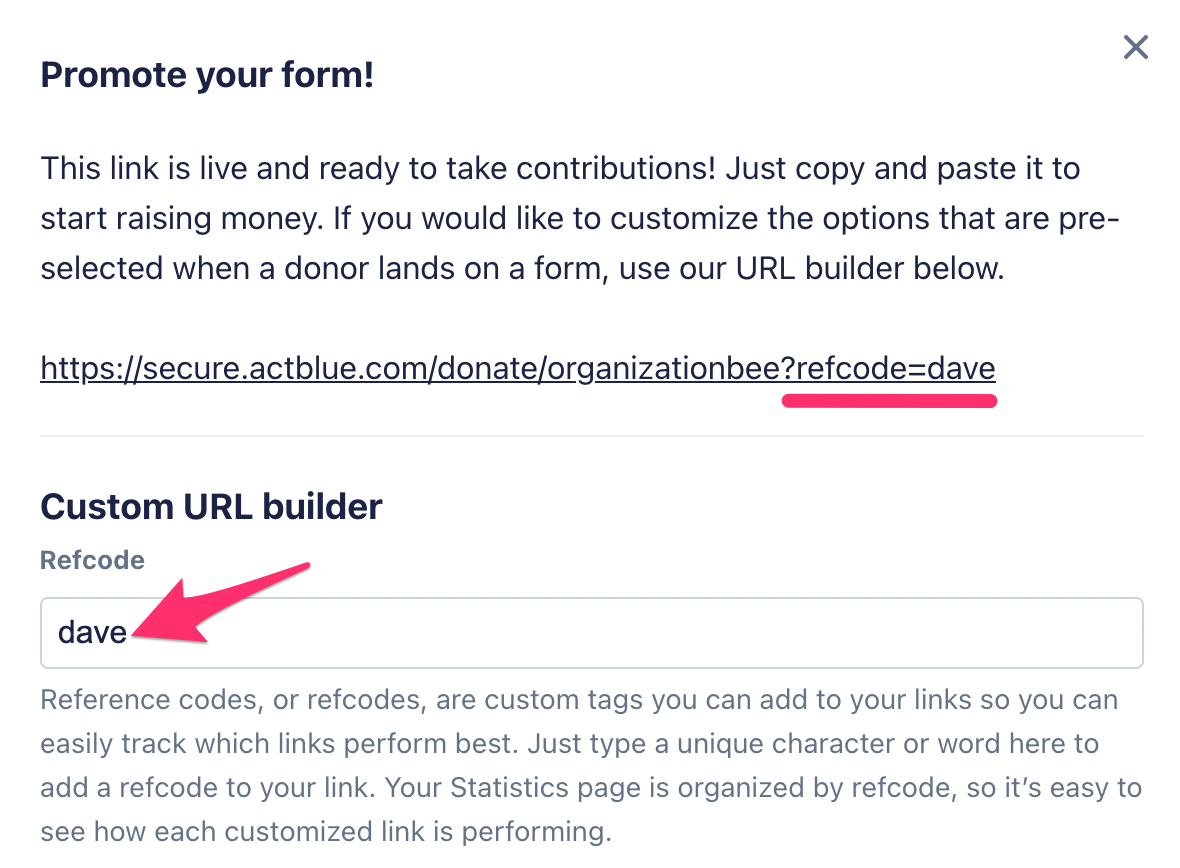
Every guest who uses a host’s custom link to buy a ticket will then be tagged with the host's refcode, ensuring you're able to track which tickets were purchased through which link. To learn more about refcodes, check out this guide!
What if I want guests to be able to purchase tickets at the door to my event?
If you’d like to sell tickets at the door of your event, we strongly recommend bringing a laptop or a mobile device, pulling up the event form on an Incognito or private browsing window, and having guests buy tickets as they walk in. This will prevent your web browser from saving cached information across transactions.
If you're using an iPhone for this process, simply open Safari, tap the Pages icon (it appears as two squares), and then tap Private to launch an Incognito window.
If you’re using a laptop, consult the following instructions per web browser:
- In Google Chrome, click File > New Incognito Window.
- In Safari, click File > New Private Window.
- In Firefox, click File > New Private Window.
- In Microsoft Edge, select Settings, More, and then New InPrivate Window.
If you have any questions, please contact our support team using the email address you use to access your ActBlue account.
Google Pay is a trademark of Google LLC.
© 2009 PayPal, Inc. All rights reserved. PayPal and the PayPal logo are trademarks of PayPal, Inc. Other names, trademarks and brands are the property of their respective owners.
Venmo is a service of PayPal, Inc., a licensed provider of money transfer services (NMLS ID: 910457). All money transmission is provided by PayPal, Inc. pursuant to PayPal, Inc.’s licenses. © 2021 PayPal, Inc