
Disclaimer: ActBlue user roles and permissions dictate what users can do on our platform. If the tools or features mentioned in this article are unavailable to you, please speak to your Dashboard Admin(s) about updating your permissions.
In this article:
- What is a contribution form?
- Is a contribution form automatically created with my ActBlue Dashboard?
- How do I create additional contribution forms?
- Where can I find my forms once they're created?
- Where can I find my form's link to share with donors?
- How do I create a form to sell tickets?
- How do I create a form to sell merchandise?
- How do I edit and customize my contribution forms?
What is a contribution form?
Contribution forms are the pages donors use to contribute to your campaign or organization. On ActBlue, you can create multiple contribution forms for various fundraising needs. You can also use contribution forms to sell tickets and merchandise.
Is a contribution form automatically created with my ActBlue Dashboard?
Yes! Once your ActBlue Dashboard is created, you will automatically be set up with a default contribution form that you can customize with text, Brandings, and other settings relevant to your specific fundraising needs.

Please note that because your default form is created with your ActBlue Dashboard, it cannot be archived and the default designation cannot be transferred to another form. We strongly recommend customizing your default contribution form before creating others as your default form is the form donors will be redirected to if they search for your campaign or organization through ActBlue's Directory.
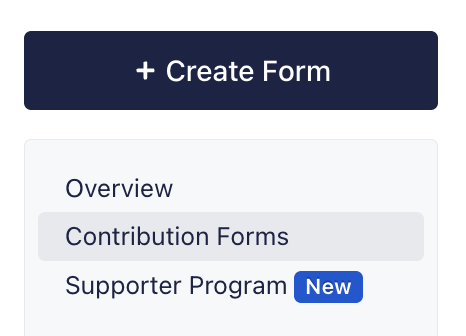
How do I create additional contribution forms?
To create additional contribution forms, simply sign onto your Dashboard and click the black Create Form button at the top of the page:

Next, select which type of contribution form you'd like to create:

- Contribution forms are standard forms which allow donors to contribute in preset or custom amounts with recurring options.
- Embed forms are standard forms you can embed directly into your campaign or organization's website. Please note that embed forms are not available for all accounts. See this guide for more information.
- Event form are forms which allow your campaign or organization to sell tickets to donors. Check out this guide for more information!
- Merchandise forms are form which allow your campaign or organization to sell merchandise to donors. Check out this guide for more information!
Once you've chosen a form type, fill out some basic information for your form including the title, URL name, and donation ask:

- The form title is the title of your form! It's the most prominent text donors will see and will be displayed at the top left of your form. You can always edit the title later.
- The form link is the unique URL name your form will have. Try choosing a short, but memorable word related to the content of your form. This word will complete the unique web address for your form, which donors will see in the URL. It will also be the name your form is identified by in your Dashboard view. You can always edit this name later.
- The donation ask is your message to donors asking for their support. It will be displayed beneath your form's title, typically on the left side of your form. For events and merchandise forms, the donation ask can be used to provide event or shipping details. You can always edit the donation ask later.
After you've filled out your form title, link, and donation ask, click the blue Next Step button at the bottom of the page.
Step two will prompt you to customize your form's layout and style by selecting a saved Branding. If you don't have a saved Branding, you will be given the option to create one. You can also choose to make your Branding public so that potential supporters can use it to fundraise on your behalf. For more information on Brandings, check out this guide!

Clicking the Next Step button will bring you to step three: post-donation settings. These options will allow you to customize both your email receipt and thanks page blurb text.
- The email receipt text is the custom text donors will receive with the email confirmation for their donation. You can use this text to thank them for their contribution and send custom links to your website, social media, or other pages. You can always edit the donation ask later.
- The thanks page blurb is the custom text donors will see immediately after contributing. You can use this text to thank them for their contribution and include custom links to your website, social media, or other pages. You can always edit the donation ask later.

Finally, click the blue Publish Form button to create your new contribution form!
You will automatically be redirected to a confirmation screen which will include a direct link to your contribution form:

Where can I find my forms once they're created?
You can view all contribution forms by signing on to your Dashboard and clicking the Contribution Forms tab at the left-hand menu:
Where can I find my form's link to share with donors?
To locate your form's link, sign on to your Dashboard and navigate to the Contribution Forms tab:

From there, simply click the name of the form you'd like to share and then copy and paste the URL displayed in the address bar at the top of the screen. This is your form's unique URL that you can share in fundraising emails, texts, and more!
How do I create a form to sell tickets?
Event forms allow you to sell tickets to potential donors. To learn more about event forms, check out this guide!
How do I create a form to sell merchandise?
Merchandise forms allow you to sell merchandise to potential donors. To learn more about merchandise forms, check out this guide!
How do I edit and customize my contribution forms?
For a more detailed walkthrough on how to edit and customize your forms, check out this guide!